How to Onboard an End User Using the MarketONE Digital Store
Contents
Overview
The following step-by-step instructions demonstrate how an end user logs on, registers, and signs up for a service using the MarketONE digital store.
Onboarding an End User Using the MarketONE Digital Store
- The user navigates to the MarketONE digital store.
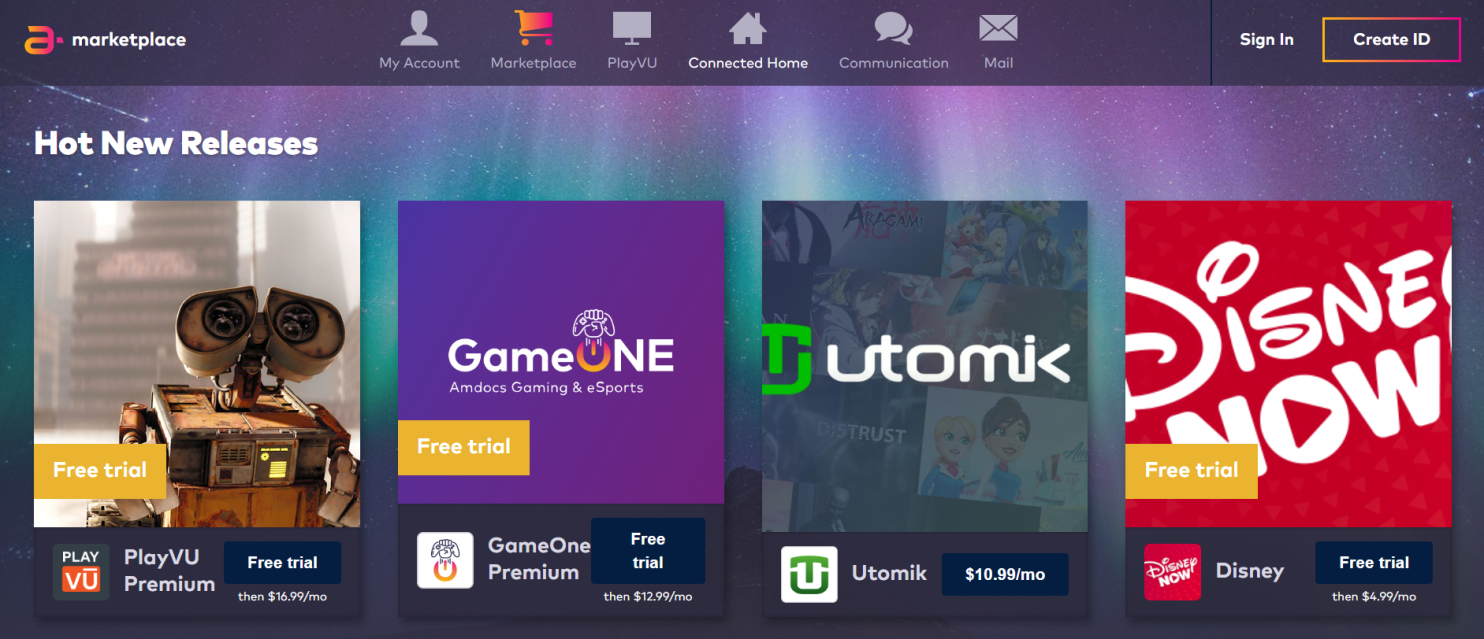
- The user decides to sign up for a PlayVU Premium free trial by clicking Free trial.

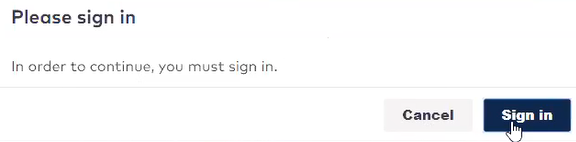
- The user is presented with a Please sign in dialog window. It informs the user that in order to continue registering for the free trial, they must click Sign in.
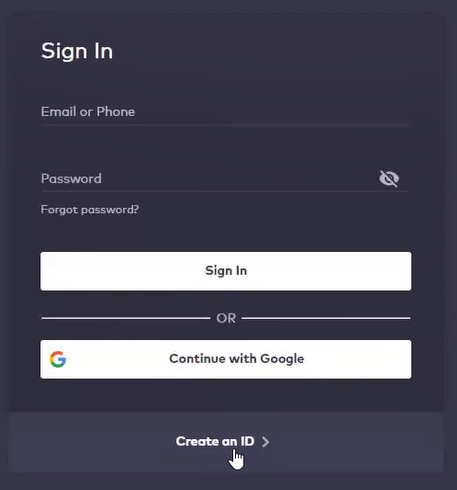
Note: Other over-the-top (OTT) providers like Netflix, Amazon, and Facebook understand that digital identity acquisition is the first step in the user journey. Once this is established, a service (like a pay channel) can then be attached to the user. The reason why this is important is because this first step allows you to acquire the user relationship, whether or not you monitize the user. Once the user is signed up, you can always reach this user to get them to complete the fulfillment journey. As a result, you will always know who they are. For example, if the user was an existing customer of a service provider, by logging in this service provider can then check the user's entitlements. The user could then get a different offer that they are eligible for given these entitlements (possibly a longer free trial, or even a subsidized service if the user is on the highest tier data plan). - The user clicks Create an ID > on the Sign In window that appears to create their user ID.
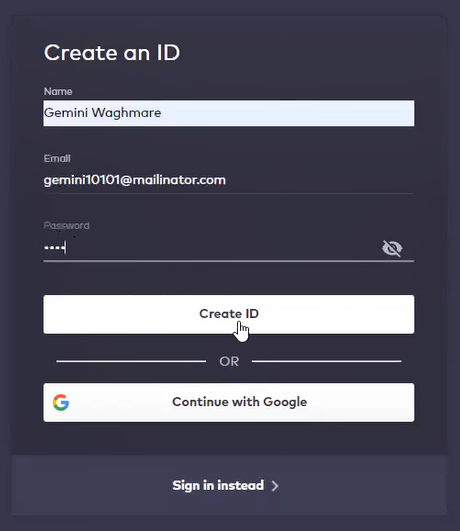
- Once the Create an ID window appears, the user fills in the Name, Email, and Password fields. They then click Create ID.
- After the ID is created, the user is navigated back to the MarketONE digital store. It shows that it now knows the user by displaying a greeting. It also indicates that while the user has a Free trial $16.99 a month offer, the user is still not a subscriber for the PlayVU Premium service. The user then clicks the PlayVU Premium Free trial button to sign up for the service. At this point the PlayVU Premium window appears.
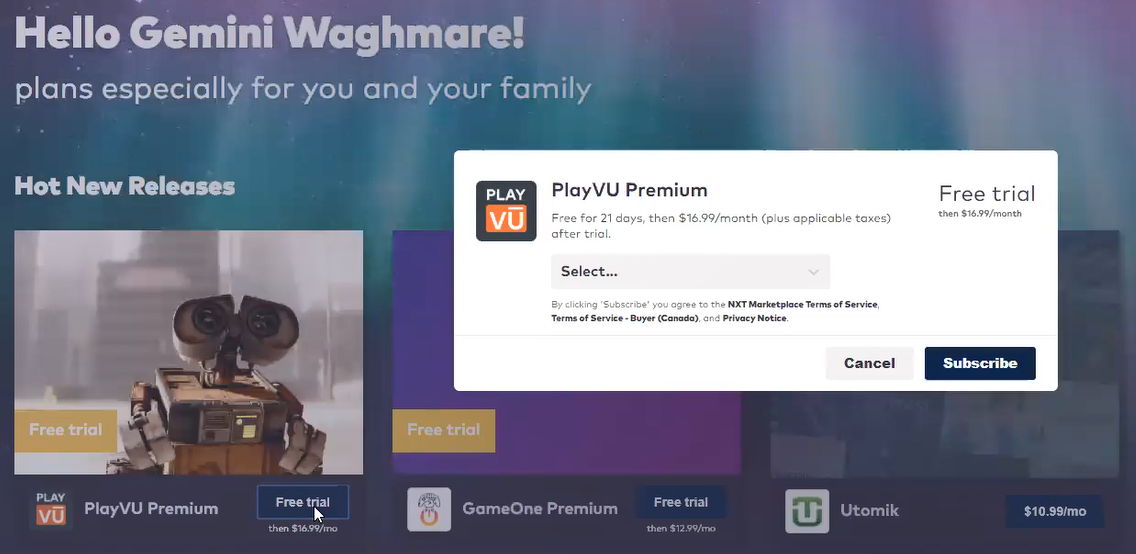
- In order to receive the PlayVU Premium service, the user needs to enter their credit card information. The user clicks the Select... drop-down menu, selects the + Add a credit or debit card option, and then fills in the required information in the Add a Credit or Debit Card dialog window. At this point the user is within the MarketONE Subscription Management(SLM) domain.
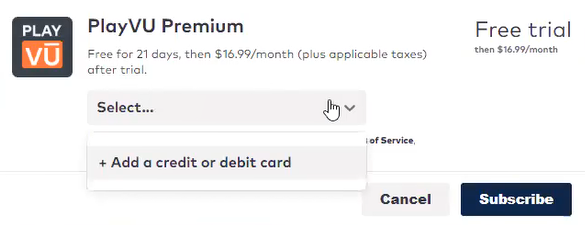
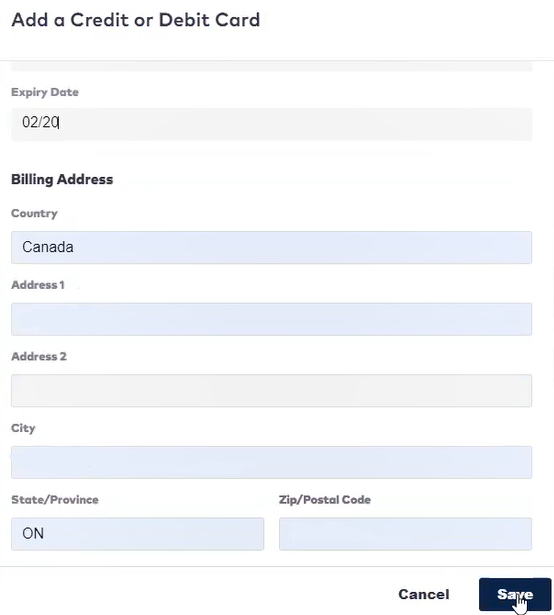
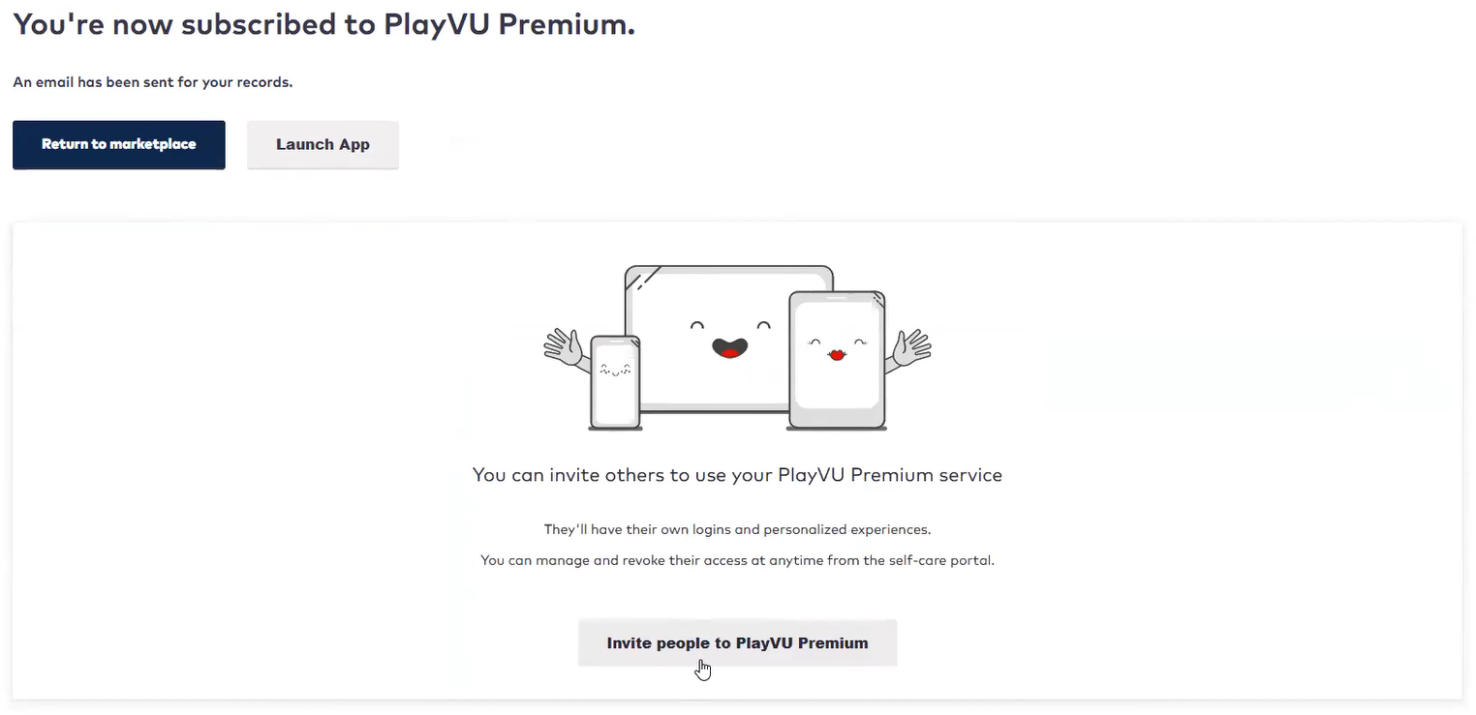
Note: You can also add additional credit or debit cards by clicking the drop-down menu and selecting the + Add a Credit or Debit Card option. - The MarketONE Subscription Management (SLM) domain then saves this credit card information to the user's user ID (as shown in the diagram above with the Visa number displayed in the drop-down menu). The user then clicks the Subscribe button to subscribe to the PlayVU Premium service. The You're now subscribed to PlayVU Premium window is then displayed informing the user that they are subscribed to the service, and that an email has been sent to them for their records. At this point the user can either return to the MarketONE dashboard, launch the application to start the service, or click Invite people to PlayVU Premium to invite up to five additional people to use the service.
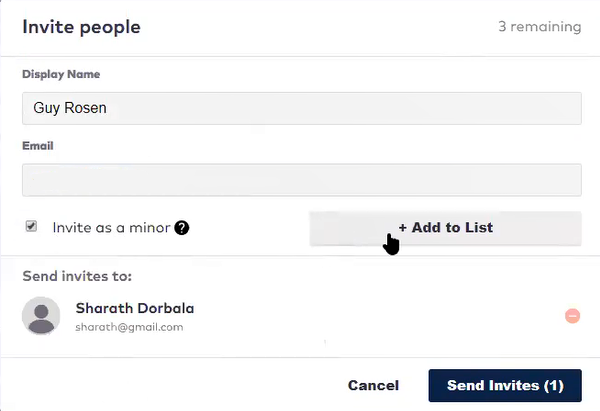
- When the user chooses this option the Invite people window appears. At this stage the user is brought from the MarketONE Subscription Management (SLM) domain, back to the MarketONE User Management (ULM) domain. From here the user can start adding new people. In this example the user invites two new people to the service. The first person is invited as a regular user, and the second person is invited as a minor (by selecting the Invite as a minor checkbox before clicking + Add to List). The reason why it is important to consider inviting minors (in this example) is because in the ULM domain the minor's consents can be managed on their behalf by the user who invited them to use the service. This allows MarketONE to be GDPR compliant.
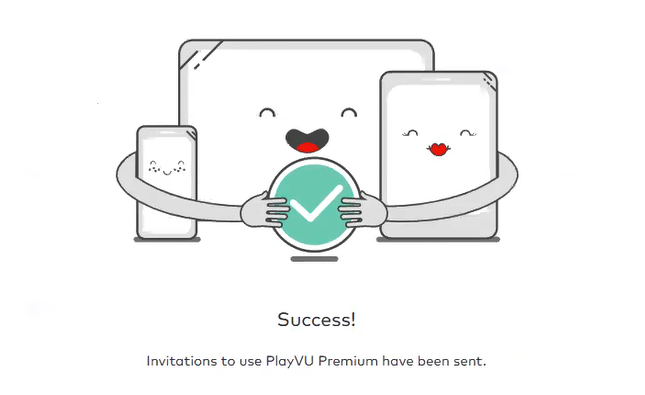
- When the user is finished inviting people, they click Send Invites, and then the Success! window appears. Both of these individuals will then receive emails to invite them to register for the service. These individuals would then have the opportunity to create IDs with their service provider in order to log into the service and use it.
- The user then navigates back to the MarketONE digital store and clicks My Account from the top menu bar.

- The user is then led to the my account page. It contains the following menu options: Accounts & Services, Billing & Payments, Users & Sharing, and Privacy Settings.

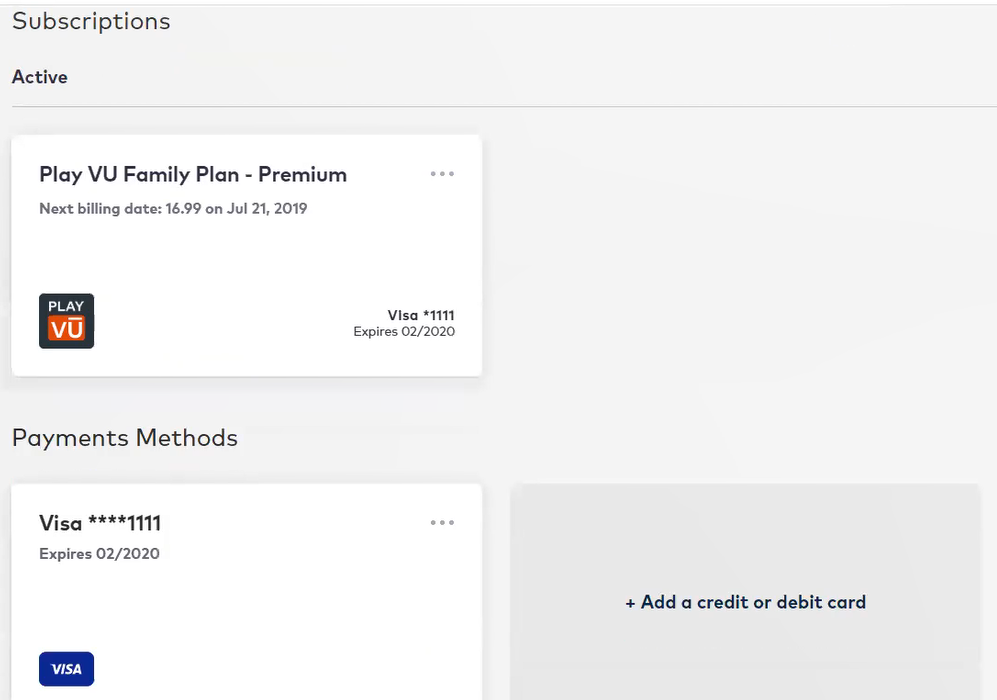
- The user selects the Billing & Payments option. This alllows the user to view information about their subscriptions and payment methods. In this example, it shows that the user has the premium Play VU Family Plan, the payment method is associated with the credit card information that the user initially provided while onboarding, and the user has the option of adding additional credit cards or debit card as the payment method.
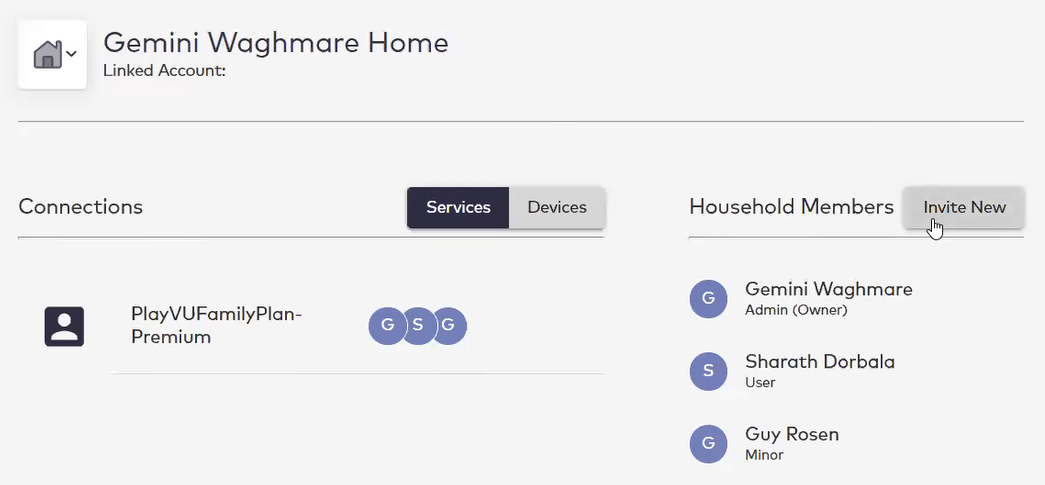
- The user then selects the Users & Sharing option. This allows the user to view the service information on the premium Play VU Family Plan that the user purchased, and to view the Admin, the User, and the Minor members that are part of the service. The user also has the option to add new members on the window by clicking Invite New.
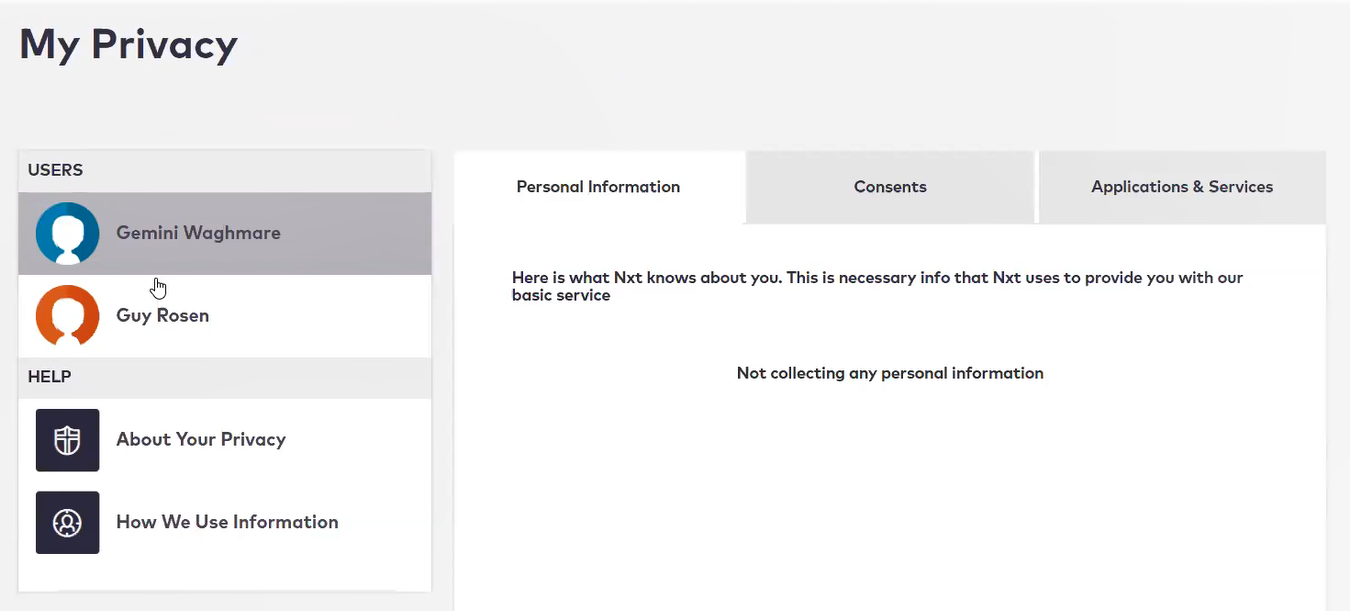
- The user then selects the Privacy Settings option. The My Privacy page appears. This allows the user to view the personal information of each user under the Personal Information tab, the consents associated with each user under the Consents tab (in this example the consents for the Minor user), along with the applications and services for each user under the Applications & Services tab. Under the USERS section the user can view the Admin (Owner) and the Minor user that were created. The Admin user can manage the Minor user's consents, but the other User that was created in this example can manage their own consents since they are not a minor.
Revision History
| Version | Description |
|---|---|
| 2020.02 | Added this topic. |
| 2020.04 | Changed the title of the topic from How to Onboard an End User into MarketONE to How to Onboard an End User Using the MarketONE Digital Store. |