Adding an Agreement
Contents
Overview
This topic contains instructions on how to add an agreement.
Instructions
To add an agreement, perform the following steps:
- Click Agreements under the PARTNER RELATIONS space in the navigation menu.
- Click Add Agreement on the upper right portion of the UI.

- When the Add Agreement windows appear, fill in the fields. There are two windows that appear when you are adding an agreement because it is a two-step process.
First, fill in the fields of the Step 1 Add Agreement window. When you are finished filling in the fields, click Next. The sections marked with a red asterisk are mandatory.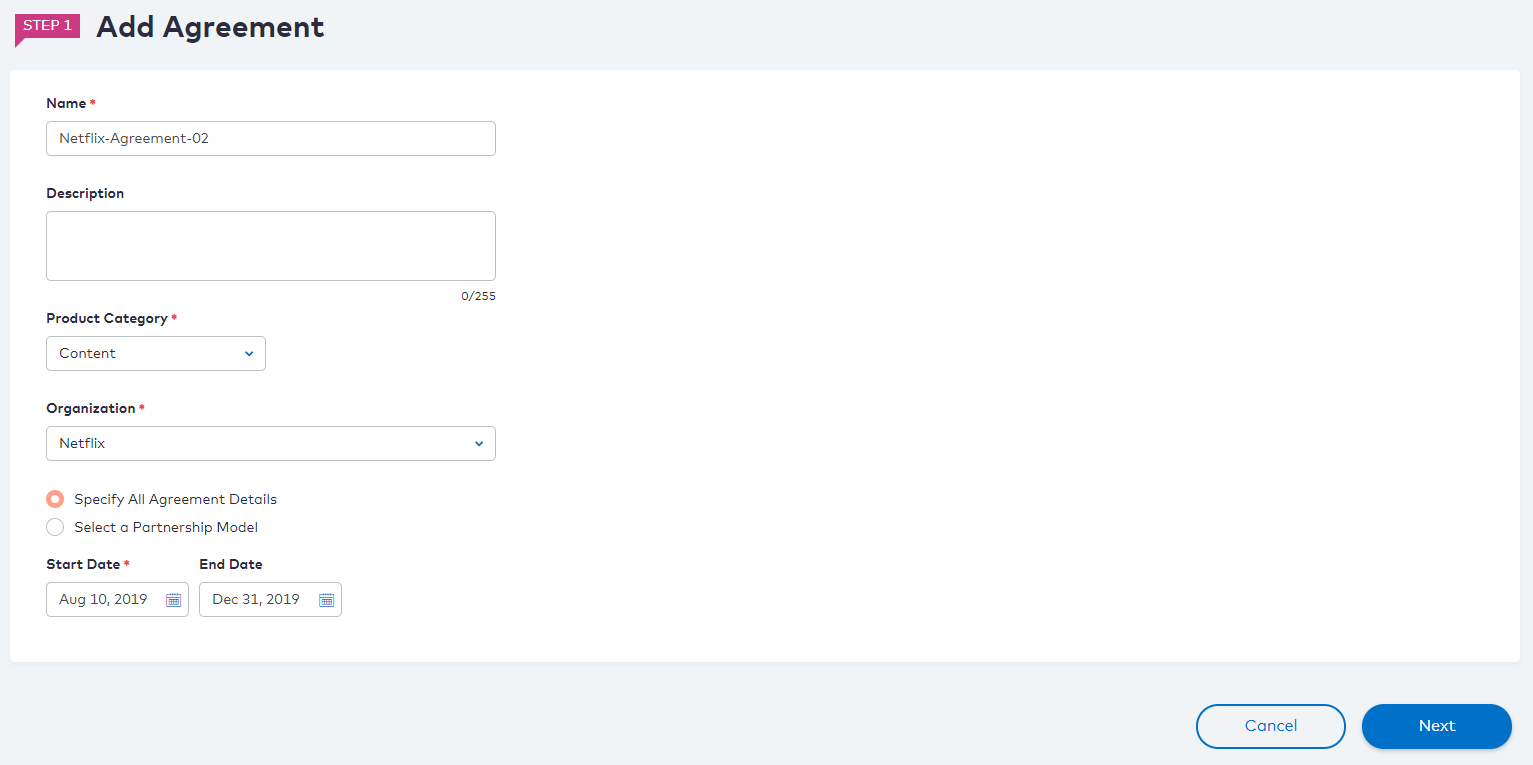
Use the information in the following table to help you fill in the fields in the Step 1 Add Agreement window.Field Name Action Required Value Description Name Type the Name for the agreement. Mandatory The value can contain characters (A-Z,a-z,0-9,space,special character !@#$%^&*-()") ‘space’ as first character will be illegal. Description Type the agreement Description. Optional The value is limited to 255 characters. Product Category Select the type of the Product or service over which the agreement is created. Mandatory - Cloud Services
- Commerce
- Connectivity
- Content
- Devices
Organization Select the partner Organization with which your organization is involved in a partnership within the frame of the agreement. Mandatory The required organization must be created prior to the agreement creation so that its name appears in the list. - Specify All Agreement Details
- Select a Partnership Model
Select either of the option buttons to define the source of the details of the partnership model for the agreement.
If you have selected the Select a Partnership Model option button, select the specific model in the list that appears.
Mandatory When selecting Specify All Agreement Details, you define the partnership model for the agreement.
Otherwise, you select an existing partnership model with all its details.
The required partnership models must be created prior to the agreement creation so that their names appear in the list. For more information, see Adding a Partnership Model.
Start Date The Date from which the agreement is valid. Mandatory This field cannot be left empty. End Date The Date on which the agreement expires. Optional You can leave the field empty. - Integration: The product of one partner is bundled with a product of another partner or the CSP involved in the relationship. For example: the CSP bundles the OTT product with another CSP service, and then sells it to the customer (such as a wireless service with Netflix).
- Reselling: The product is provided by one partner, but it is distributed by the CSP involved in the partnership. For example: the CSP sells an OTT product and subscription plans to a customer as it (such as selling the Netflix premium package).
- Incoming Invoice: One partner issues invoices for the services offered by the CSP involved in the partnership.
- Incoming Payment: One partner issues payments for the services by the CSP involved in the partnership.
- Invoice: The CSP issues invoices for the services of another partner involved in the partnership.
- Payout: The CSP issues payments for the services of another partner involved in the partnership.
- Monthly
- Quarterly
- Weekly
- Yearly
- Note: The settlement frequency depends on the contractual terms established between the OTT and the CSP. The monthly settlement time interval is the most common in the industry.
- 7 Days
- 10 Days
- 30 Days
- 60 Days
- 90 Days
- Note: The payment term depends on the contractual terms between the OTT and the CSP. The settlement report is prepared based on the CSP time zone. If the CSP operates in multiple time zones, then typically the head office time zone is used where the finance and revenue assurance teams are located.
- When you are finished, click Save or Save and approve. The agreement you have added will appear on the list in the Agreements section.

Second, fill in the fields of the Step 2 Add Agreement window.
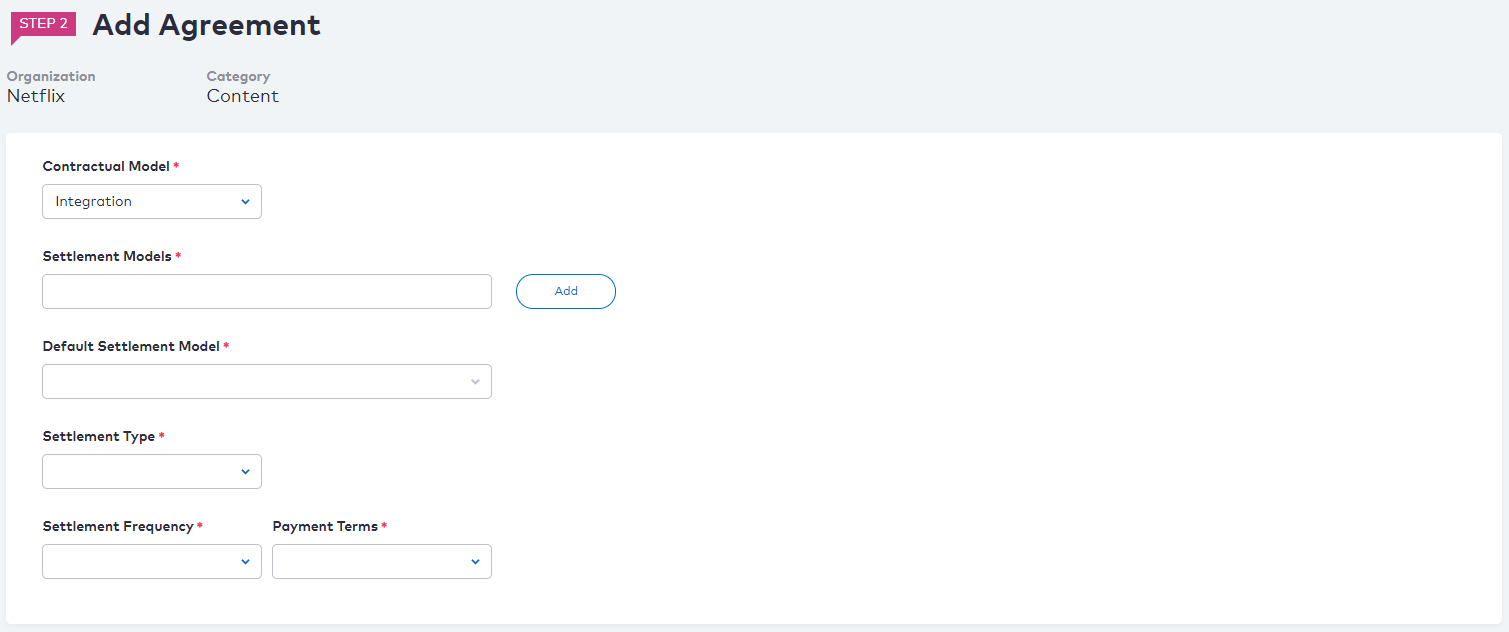
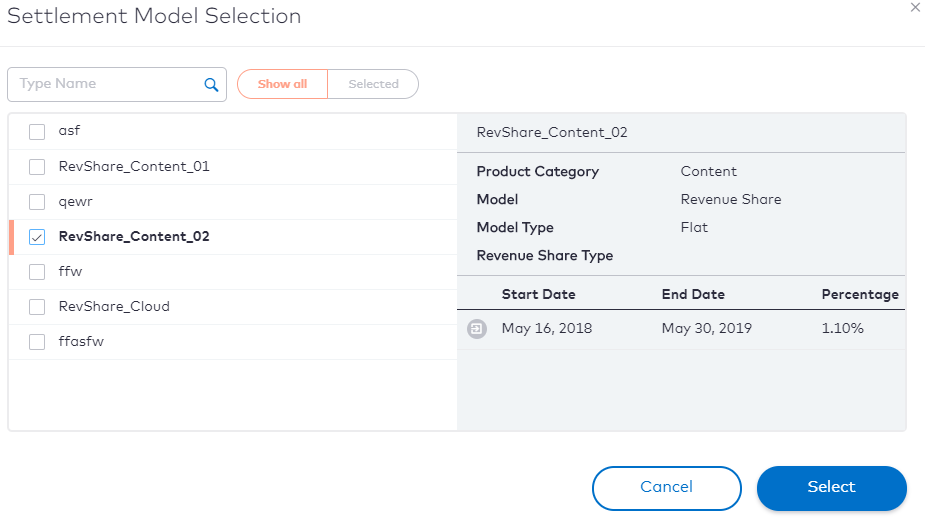
To fill in the Settlement Models field, click Add. The following Settlement Model Selection window appears. Select the settlement model from the list, and then click Select.
Note: Once you add the settlement model you can click Edit to change it. See Step 3 in the Editing an Agreement section for more information.
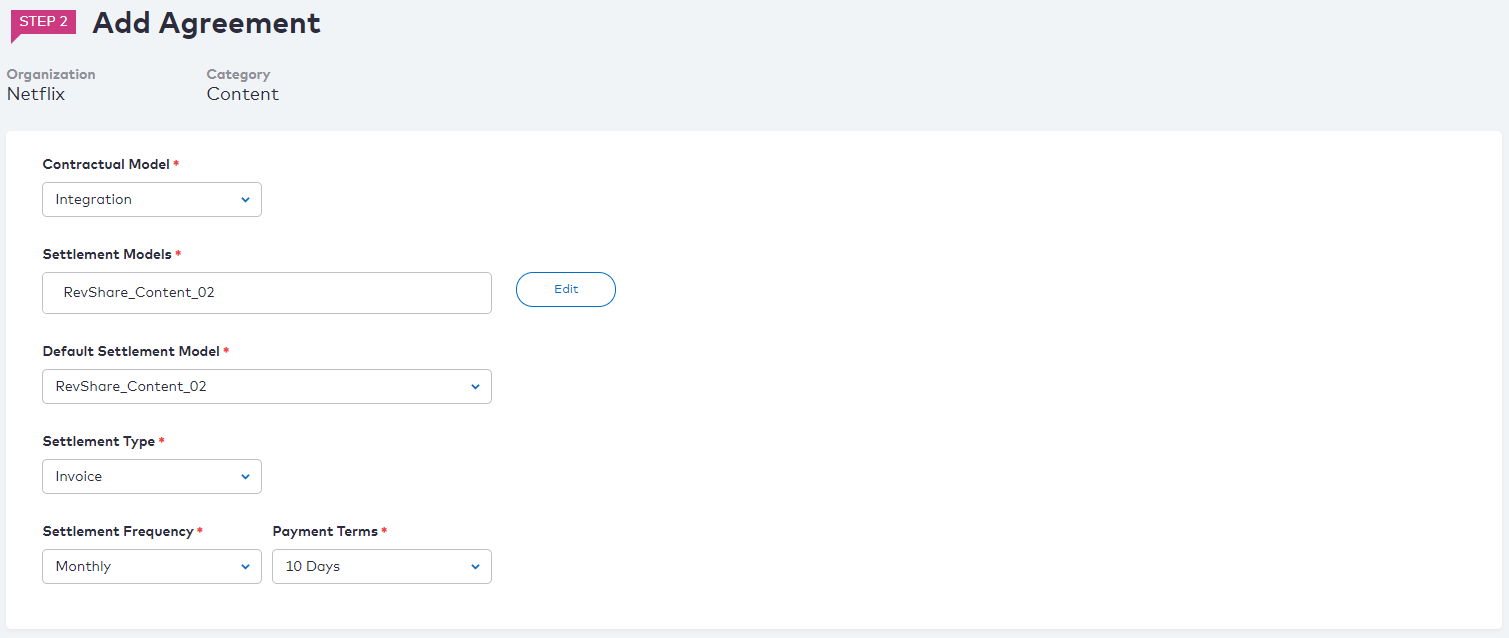
Use the information in the following table to help you fill in the fields in the Step 2 Add Agreement window.
| Field Name | Action | Required | Value Description |
|---|---|---|---|
| Contractual Model | Define the contractual relationship with the partner. | Mandatory | |
| Settlement Models | Click Add to select one or more Settlement Models for the agreement. | Mandatory | The required settlement models must be created prior to the agreement creation so that their names appear in the dialog box that opens. For more information, see Adding a Settlement Model. |
| Default Settlement Model | Select the default Settlement Model for the agreement. | Mandatory | The list of values comprises the settlement models that you have added in the previous procedure step. |
| Settlement Type | Select the type of Settlement to be associated with the relationship. | Mandatory | |
| Settlement Frequency | Select the time interval with which the partners involved in the partnership handle the accounting issues. | Mandatory | |
| Payment Terms | Select the suspension period after which the accounting issues between the partners involved in the partnership are handled. | Mandatory |
Revision History
| Version | Description |
|---|---|
| 2019.08 | Initial release. |
| 2019.12 | Added Contents and Revision History sections. |
| 2020.05 | Updated the descriptions for Contractual Model, Settlement Type, Settlement Frequency, and Payment Term field names in the table. |